How To: Floral Lighting, Two Ways


Two lighting set ups for two very different looks
In collaboration with, the oh so talented Tess Meyer who designed the beautiful and original floral arrangement, I captured two very different lighting scenarios using a quick change in the set up. Keep reading for a look into behind the scenes and how to create the looks!
* * *
Behind the scenes styling

Tess woking her magic!
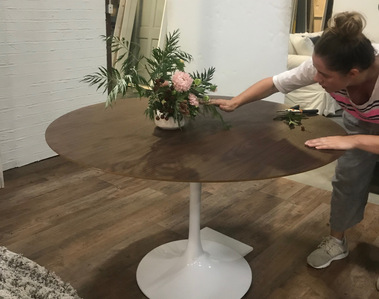
Getting the arrangement on set

Final styling tweaks
* * *
Look #1
The lighting direction for the first look is what I would call a "soft, morning light." Think about the mornings where you wake up and and imagine going back to bed for the rest of the day. It's still bright outside but there maybe a slight drizzle and thick blanket of clouds in the sky.
The shadows are rich and still have plenty of detail. The lighting, although soft, has clear direction wrapping around the arrangement from the left and fading off to the right side of the frame.
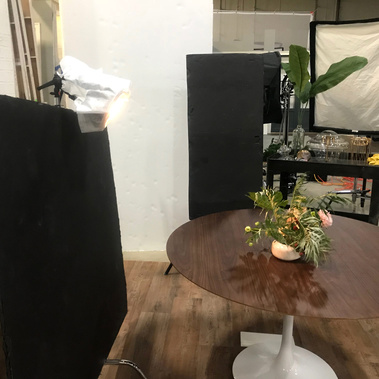
Look 1: How to create the light

Key light: Large soft box slightly feathered with a 1 1/4 stop 8x8 silk. A head with zoom reflector and 10 degree grid

The set has a French door where the key, scrim, and head with grid are set behind

Negative fill (black card) on the right of the arrangement and a single panel V-flat for fill on the wall in the background
The set is shaped like an "L", the left side has a French door and the back wall is half solid grey and half faux brick split by a wooden beam. The doors act as a "frame" for the light and was the perfect spot for the Key light placement. I brought in an 8x8' 1 1/4 stop silk behind the doors, along with a large soft box feathered into the silk. That combination produced the open, soft morning light I was trying to replicate. The florals were falling a little flat and needed a little sparkle, I added in a head with a 10 degree grid positioned straight into the silk and directed at the arrangement. Using a medium sized black card, I built in some negative fill on the right side of the florals. This kept the shadows deep and rich but still left all that delicate detail in the shape of the flowers. The last thing I added was a single sided V-flat and positioned it on the back, right of the set to get a little more light into the shadows created by the beam.
* * *
Look #2
For the second lighting version, I wanted to have something imaginative, conceptual, and silhouetting. I aimed to show detail in some of the shadows on the flowers and preserve the delicate texture each variety showcases. This was captured on the same set as the first image and with a few quick modifications I was able to get this dramatically different image. Note that I did convert the image to black and white in Photoshop.
Look 2: How to create the light

A head with a ten degree grid and tough-spun diffusion material
Black card under the head used as the background

Using live view for tack-sharp focus
I made a few quick-changes to the lighting so I could capture that dramatic silhouetted look. First, I turned off all of the lights from the previous set up and moved the head with the 10 degree grid directly behind the floral arrangement. I raised it up, tilted it down at a 45 degree angle and pointed directly at back of the floral arrangement. When doing this technique, be careful of lens flare and raise the light high enough so that it is not directly hitting the lens. After getting the head with grid turned on, I noticed the light was a bit too hard so I wrapped a single layer of tough-spun diffusion material around it. This spread out the light a little more and softened the edges of the shadows nicely. To get that silhouetted look, I added a black card for the background behind the arrangement. It was placed right under the head and propped up against the stand holding the light. I double checked my focus using live view and captured my final image. I brought the file into Photoshop and converted it to black and white for full dramatic effect!
* * *

Voila!
Maximize your time and double your assets using quick-change techniques to create two very different looks!
Want to see more of Tess' floral arrangements and super power skills? Check out her portfolio here!